Add a gallery with HUNDREDS of images easily to your website with Vue.js
Have you ever wanted to add a lot of images to your website, for example to build a gallery or display a collection of items, but then you remember that it's a lot of work and you don't do it anymore? And you were very excited about the idea, but sometimes it's hell to add the images manually, and then if you want to make any changes to the structure it's even worse because you have to make the changes one by one. Maybe you will, maybe you won't, but if you do it will be once in your life and you won't turn that page again because it's a lot of work (or maybe I wouldn't do it again because I'm sometimes lazy).
Anyway, today I want to show you a way to build a super easy and fast gallery, so much so that you will have like 20 galleries on your website.
Before we start
This tutorial is aimed at people with little or no javascript experience, so if you don't know anything about it, don't worry, I'll guide you step by step on what to do. If you already know javascript or programming, how cool! It will be very easy to follow then.
UPDATE
If you read the tutorial with javascript and jQuery, this is exactly the same but using an alternative methods. At the end of the tutorial there's some advices in which method use.
Requeriments:
- a little of html and css knowledge
- a little knowledge of javascript (optional)
- actitude to learn something cool
What is Vue.js
"Vue (pronounced /vjuː/, like view) is a JavaScript framework for building user interfaces. It builds on top of standard HTML, CSS and JavaScript, and provides a declarative and component-based programming model that helps you efficiently develop user interfaces, be it simple or complex."
Sounds cool right? It doesn't matter if you didn't understand anything of the above, in resume, Vue can help us to generate dynamic content for websites. And that's very useful for galleries and collections.
Let's get started
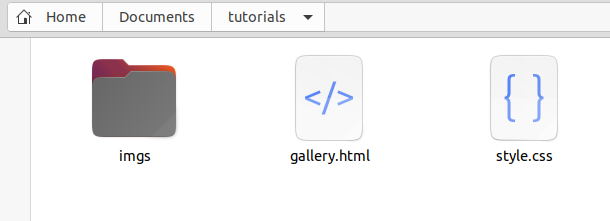
Create a html page for your content
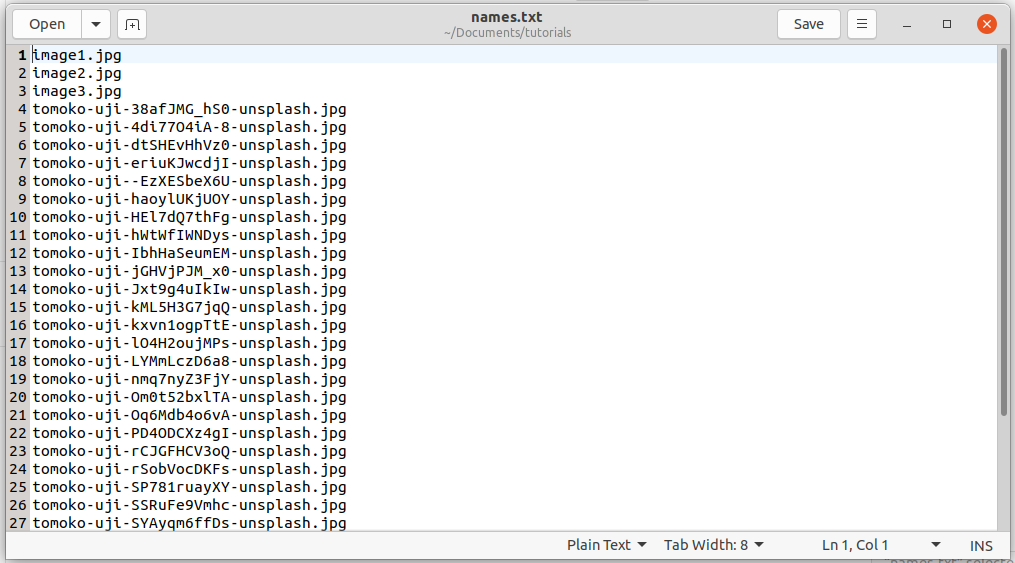
Create for example a "gallery.html" file, with the following content:
<!DOCTYPE html>
<html lang="en">
<head>
<title>My gallery</title>
<meta charset="UTF-8" />
<meta name="viewport" content="width=device-width, initial-scale=1.0">
</head>
<body>
<header>
<h1>My gallery</h1>
</header>
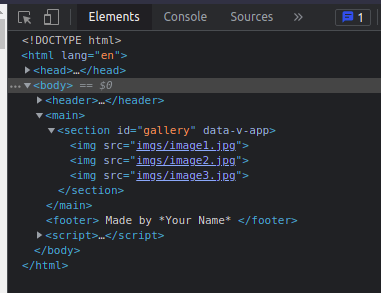
<main>
<section id="gallery">
</section>
</article>
</main>
<footer>
Made by *Your Name*</a>
</footer>
</body>
</html>
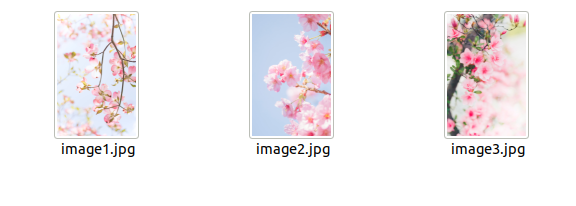
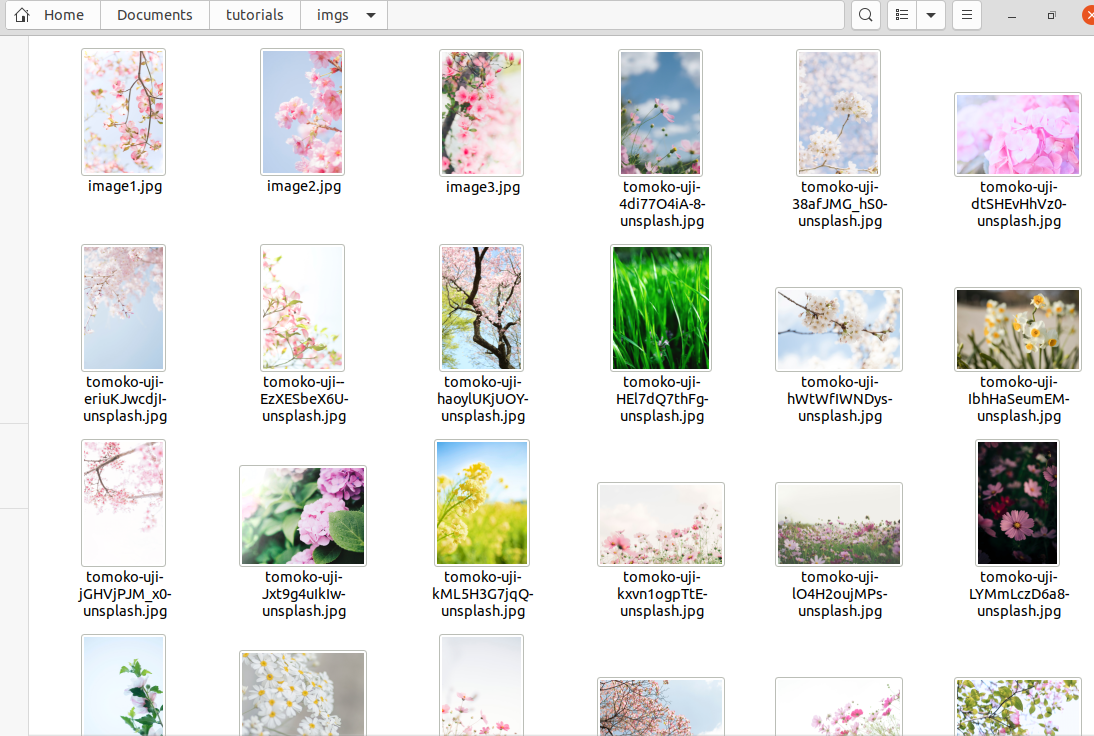
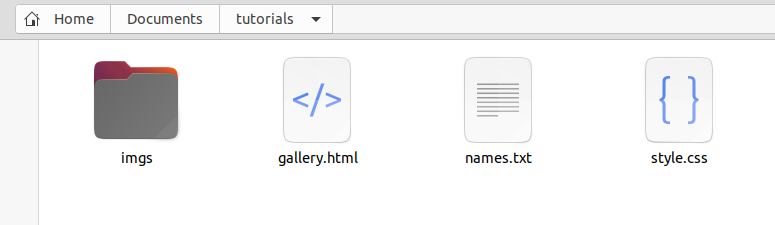
Save your images in a directory
In the same location you have gallery.html, create a directory called for example "imgs" and move all the images you want to display there. In my example, I have the following images:
Add vue.js to your code
One of the advantages of Vue is that you can add it to your website with just one link. Inside your <head> tag, paste the following code:
<script src="https://unpkg.com/vue@3/dist/vue.global.js"></script>
Create your Vue snippet
Just after the </body> closing tag, add the following script:
<script>
    const { createApp } = Vue

    createApp({
      data() {
        return {
          images: []
        }
      }
    }).mount('#gallery')
  </script>
Quick explanation:
We are creating an instance of Vue which will affect directly the content on the <section> with the id "gallery" through the function createApp().mount (mount("#gallery)).
createApp is just a function to initialize Vue. There we have a thing called "images" which is an array. If you don't know what an array is, is just a piece of data (a variable) that can store more than one value.
In the array "images", we are going to add the names of our images with their extension, for example in my case, I will add the following:
images: ["image1.jpg", "image2.jpg", "image3.jpg"]
It is very important to add the images between " " and separated by commas.
Declare your image component
Inside <section id="gallery">, add the following code:
<img v-bind:src="'imgs/'+image" v-for="image in images" />
Quick Explanation:
This <img> element will serve as a "reutilizable element" which will render all the images we added in the array "images".
v-for="image in images"is a loop. For people not familiarized with javascript or programming, this will read all the contents of "images" one by one, ie first it will go through "image1.jpg", then "image2.jpg" and finally "image3.jpg". When it is the turn of the corresponding image, it will have a temporary name "image". That's why it's "image in images".v-bind:src="'imgs/'+image"is like the original src attribute, but by adding v-bind: we are indicating to Vue that the source will be dynamic and obtained of the array "images". As explained above, when is the turn of the corresponding image, called "image", Vue will print dynamically an<img>element with the source of the corresponding image (the name "image1.jpg" for example), but we have to make sure with add the path of the images folder, thats why we 'imgs/' along with the "image", because the images are in a folder called "imgs".
Horray! If you save your changes and refresh the page, you will see that know we have all the images in the website. And if you inspect your page, you will see that it appears that you have tree images there like if you write it manually. Is like magic!

We're almost finish, we need to add some style because in this case the images are to big to display them.
Adding style to the gallery
Create an style.css file and add the following code to fix the size of the images and also for the gallery doesn't look so plain, don't forget to link your page to the stylesheet with <link rel="stylesheet" href="style.css" />.
:root {
    --bg-color: #f5d4ff;
    --text-color:#fff;
}

* {
    margin: 0;
    padding: 0;
    box-sizing: border-box;
}

body {
    background-color: var(--bg-color);
    color: var(--text-color);
    text-shadow: 1px 1px 2px #999;
    font-family: sans-serif;
}

header {
    margin: 2rem 0;
}

header h1 {
    font-size: 2rem;
    font-weight: normal;
    text-align: center;
}

main {
    width: 80%;
    margin: 20px auto;
}

#gallery {
    display: flex;
    flex-wrap: wrap;
    justify-content: center;
}

#gallery img {
    margin: 10px;
    max-width: 300px;
    height: max-content;
    padding: 1rem;
}

footer {
    text-align: center;
    font-size: 0.9rem;
    padding-bottom: 1rem;
}

@media only screen and (max-width: 768px) {
    main {
        width: 95%;
    }
}
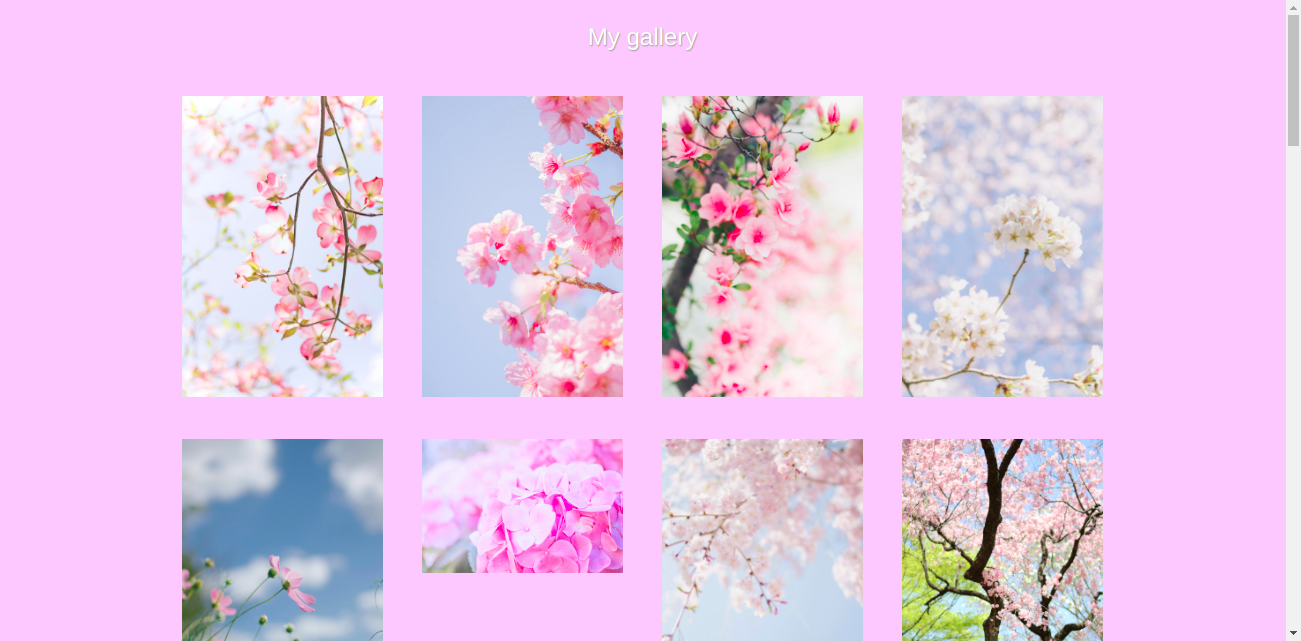
Now your gallery should look like this:
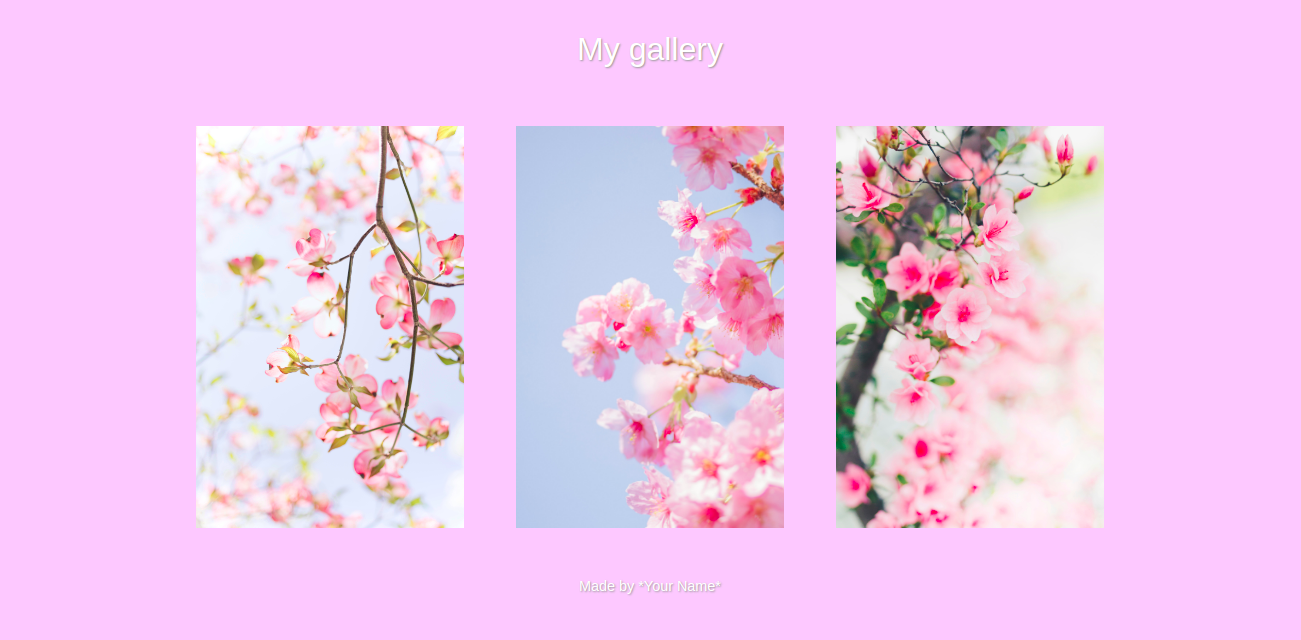
Much better. Customize your gallery as much as you want!
Big quantity of images
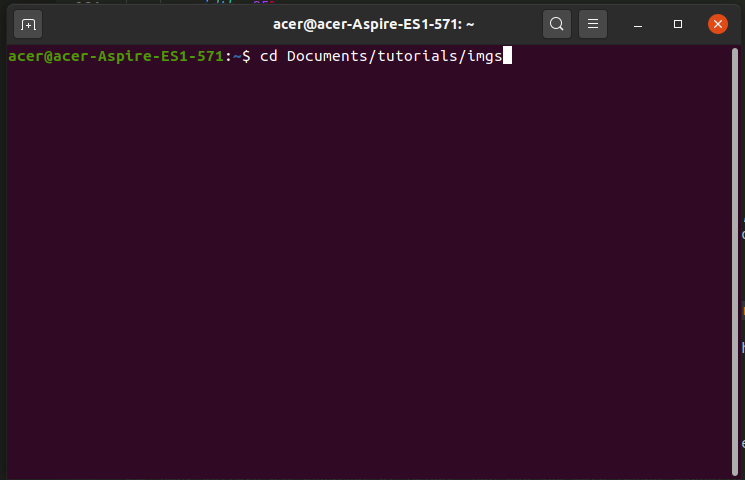
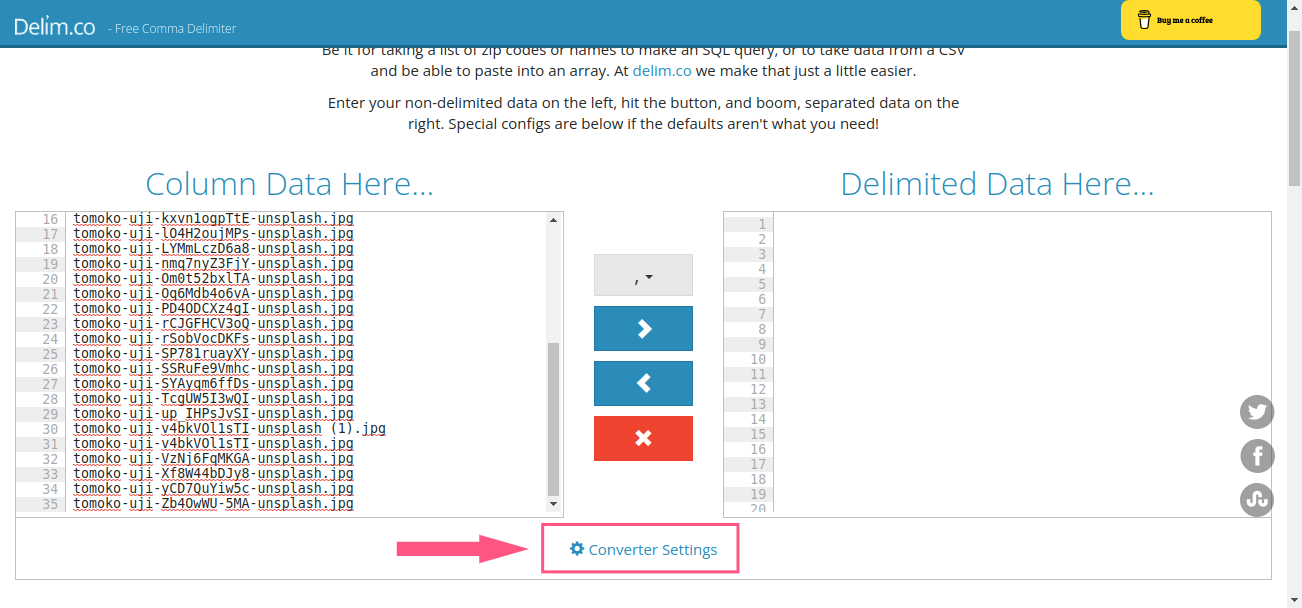
Technically now we have our gallery! But imagine you have like 100 images, or your images have big names like the ones in my screenshot, you don't want add the names to the array one by one. This trick will help you a lot with the process (works in all operating systems).
- Open your terminal or command prompt of your operating system.
- Enter the following command:
cd YOUR PATH TO YOUR IMAGES FOLDER. For example in my case my path is "Documents/tutorials/imgs", so my command iscd Documents/tutorials/imgs.
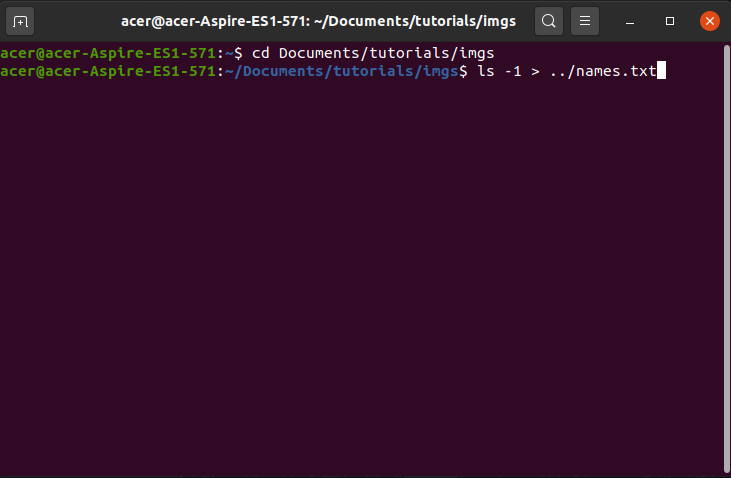
- Enter the command:
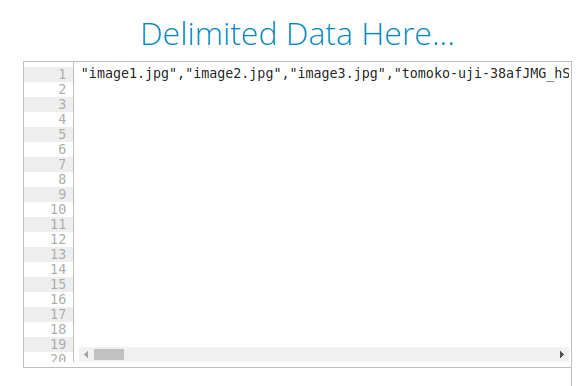
ls -1 > ../names.txt. This will generate a file "names.txt" with all the names of your images, as you can see in the image. Open the generated file and copy all its contents.
- Go to this website https://delim.co/, and paste the content in the "Column Data Here" column.
- Click the option "Converter Settings" and where it says Quotes, select "Double".
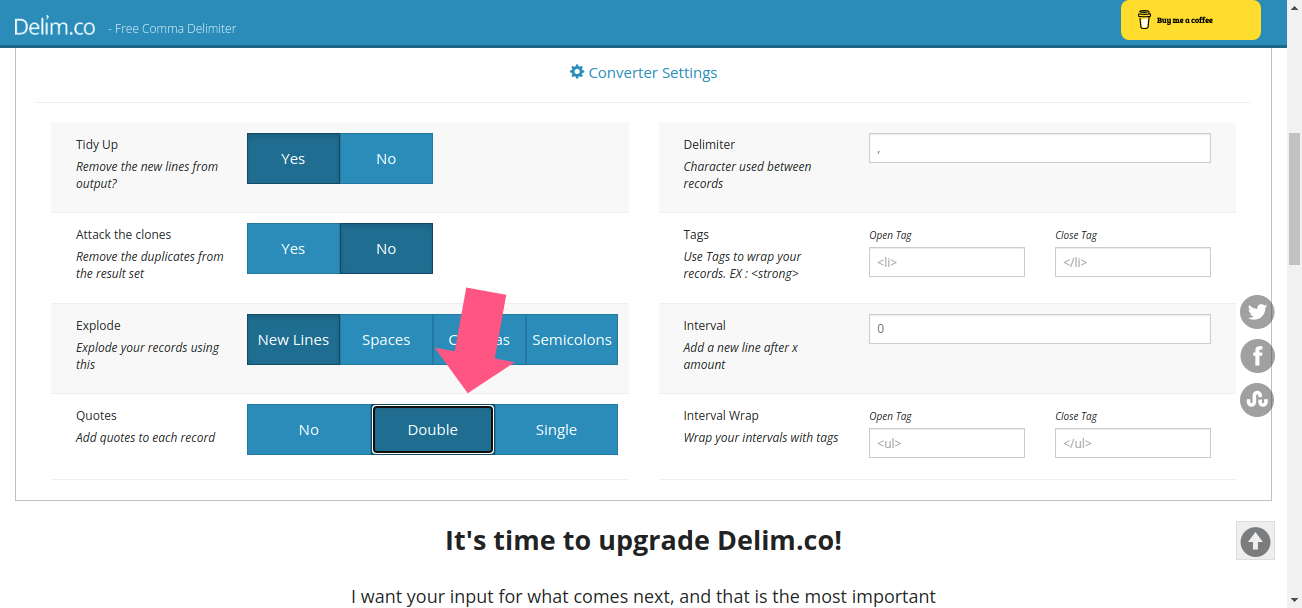
- Click the right arrow button and now you have all your names separated by double quotes and commas"!
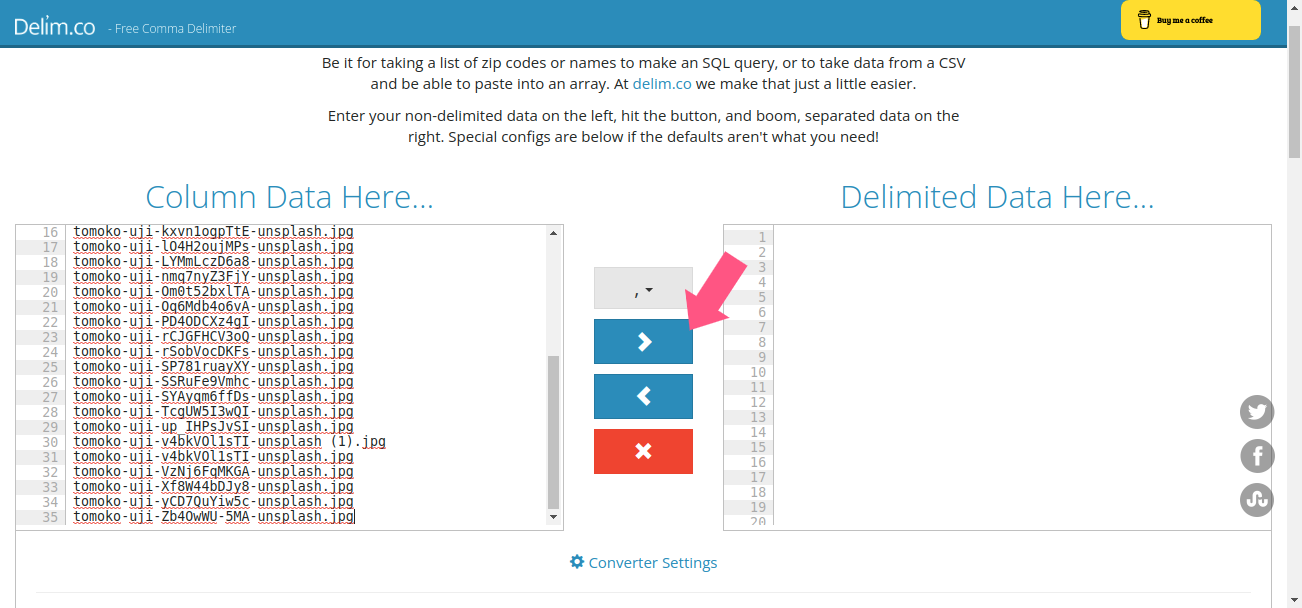
- Select and copy again, and paste the content inside of the array "images". Note: Don't replace all the content, if you repeat names the images will appear repeated too.
Now your gallery has a lot of images, you can add more images manually adding the names in the array or repeating the trick again.
Bonus: Open the image in a new tab.
If you want your images to have links to a new window, just replace the content of <section id="gallery"> with this:
<a v-bind:href="'imgs/'+image" v-for="image in images" target="_blank">
    <img v-bind:src="'imgs/'+image" :key="image" />
</a>
In this case, we are also generating dynamically link tags to all our images.
Bonus 2: Play with Vue and generate more complex structures!
With the beneficts of vue we can generate more complex content dynamically, for example, let's create a gallery of polaroids with the name of the image with it. Replace the content inside <section id="gallery"> with the following code:
<div class="polaroid" v-for="image in images">
    <a v-bind:href="'imgs/'+image" target="_blank">
        <figure>
            <img v-bind:src="'imgs/'+image"/>
                <figcaption>
                    <em>{{ image }}</em>
                </figcaption>
        </figure>
    </a>
</div>
Note that now v-for="image in images" is placed in the new <div class="polaroid"> element, remember, the element you want to repeat is the one you have to add the sentence v-for="image in images", and everything inside this element will repeat, too. Note that Vue allows us to directly put javascript values inside our html, in this case, we can display the name of your images writting directly {{ image }}, remember image is the temporal name of the image in turn.
Now add the following css to your previous style.css file:
.polaroid {
    background-color: #fff;
    margin: 10px;
    height: max-content;
    box-shadow: 5px 5px 10px #999
}

.polaroid a {
    text-decoration: none;
}

.polaroid figcaption {
    color: rgb(94, 92, 92);
    text-align: center;
    padding: 1rem 0;
}
Now our gallery looks like this:

That's all! Experiment with different designs and see what happens.
Conclusions and recommendations
We have built a dynamic gallery with VueJS, it can have hundreds of images and the maintenance will be a piece of cake.
This tutorial was aimed at people with little or no experience in javascript or programming in general. You can have a cool website without being an expert, but if you are interested in following the path of web development in the future, I recommend that you delve into the area of programming and learn javascript. Web development is a world, but javascript will be a good way to start your path. Then I highly recommend you take a deeper look at Vue, we literally only use 1% of its capacity. If you already know javascript, learn how to use Vue! You will not regret.
Thank you for reading! I hope this tutorial has been helpful. This is ONLY ONE of the ways you can make a dynamic gallery. Soon I will upload the same tutorial but now using only pure Javascript and the equivalent using jQuery.
UPDATE
I already did the javascript and jQuery tutorial.
Which method use?
I have presented you three forms of doing the same thing, you can use any of them, but maybe this advices will help you.
If you want to make a simple and fast gallery, I mean without a complex structure, and also you don't have or don't want to depend on any external framework like jQuery or Vue, use the pure javascript method.
If you want to do the same thing as the previous point but for some reason you are already using jQuery, use the jQuery method.
If you want to have a gallery with a more complex structure, I recommend using the VueJS method, since being able to handle the html elements directly as they are instead of text is a pretty good advantage and avoids having syntax errors.
I'll also add a tutorial to open the images in a popup. Stay tunned ✨.
Download the full code of the project here.
Learn Javascript at w3schools.com
Learn Vue at vuejs.org
Never stop trying 🌠
Credit for the example images: TOMOKO UJI