Add a gallery with HUNDREDS of images easily to your website using Javascript or jQuery
Have you ever wanted to add a lot of images to your website, for example to build a gallery or display a collection of items, but then you remember that it's a lot of work and you don't do it anymore? And you were very excited about the idea, but sometimes it's hell to add the images manually, and then if you want to make any changes to the structure it's even worse because you have to make the changes one by one. Maybe you will, maybe you won't, but if you do it will be once in your life and you won't turn that page again because it's a lot of work (or maybe I wouldn't do it again because I'm sometimes lazy).
Anyway, today I want to show you a way to build a super easy and fast gallery, so much so that you will have like 20 galleries on your website.
This time will be built the gallery with two methods, one using pure javascript and second with jQuery, I put both in the same tutorial because it's pretty almost the same but with little differences.
Before we start
This tutorial is aimed at people with little or no javascript experience, so if you don't know anything about it, don't worry, I'll guide you step by step on what to do. If you already know javascript or programming, how cool! It will be very easy to follow then.
If you read the tutorial with Vue, this is exactly the same but using two alternative methods. At the end of the tutorial there's some advices in which method use.
Requeriments:
- a little of html and css knowledge
- a little knowledge of javascript (optional)
- actitude to learn something cool
Let's get started with the Javascript method
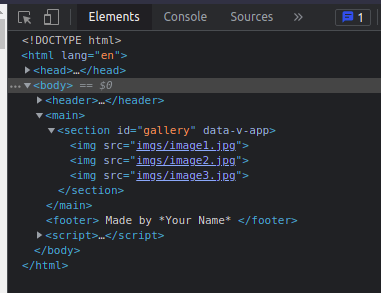
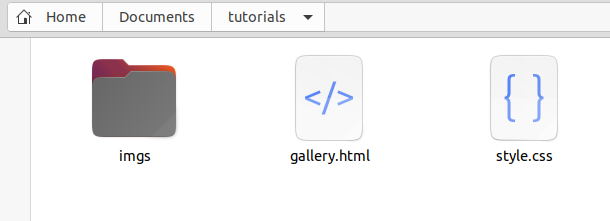
Create a html page for your content
Create for example a "gallery.html" file, with the following content:
<!DOCTYPE html>
<html lang="en">
<head>
    <title>My gallery</title>
    <meta charset="UTF-8" />
    <meta name="viewport" content="width=device-width, initial-scale=1.0">
</head>
<body>
    <header>
        <h1>My gallery</h1>
    </header>
    <main>
            <section id="gallery">
            </section>
        </article>
    </main>
    <footer>
        Made by *Your Name*</a>
    </footer>
</body>
</html>
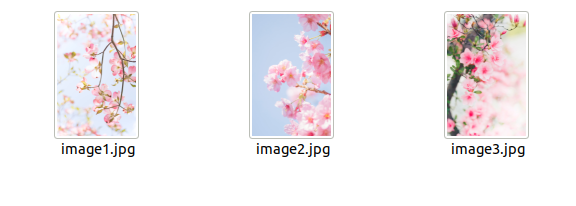
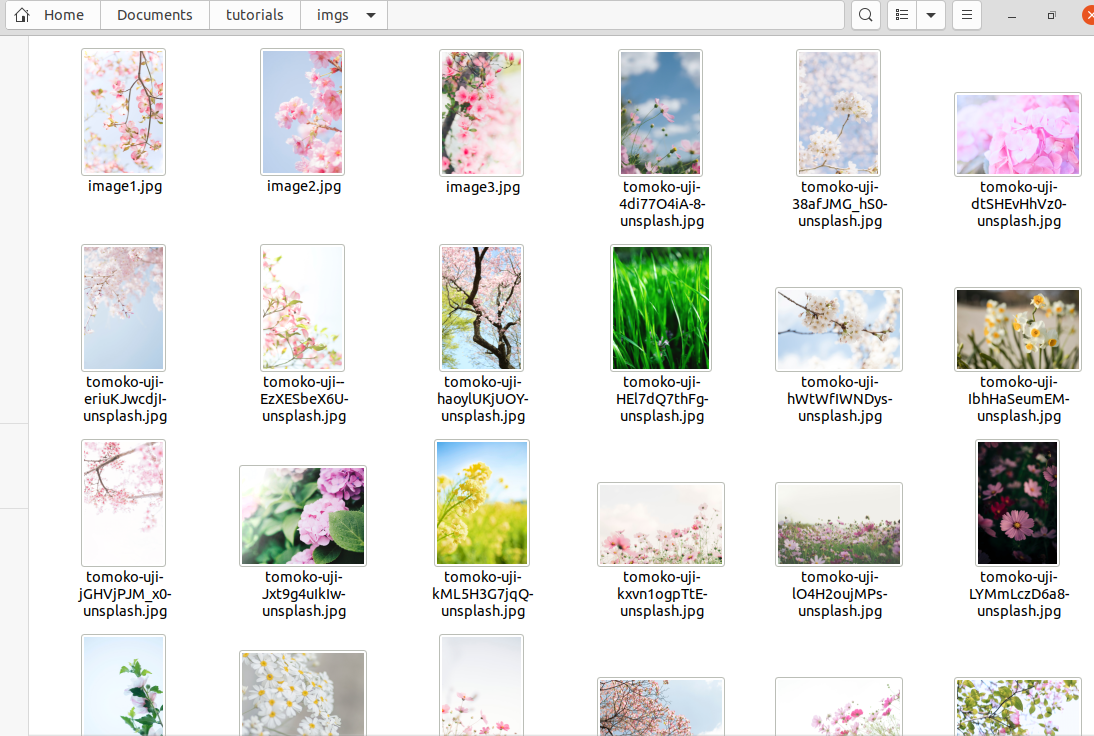
Save your images in a directory
In the same location you have gallery.html, create a directory called for example "imgs" and move all the images you want to display there. In my example, I have the following images:
Create your script
Just after the </body> closing tag, add the following script:
<script>
    let images = [];
    let gallery = document.getElementById("gallery");
    images.map(image => {
      gallery.innerHTML += `<img src=imgs/${image} />`;
    })
</script>
Quick explanation:
In this script, we have a thing called "images" which is an array. If you don't know what an array is, is just a piece of data (a variable) that can store more than one value.
In the array "images", we are going to add the names of our images with their extension, for example in my case, I will add the following:
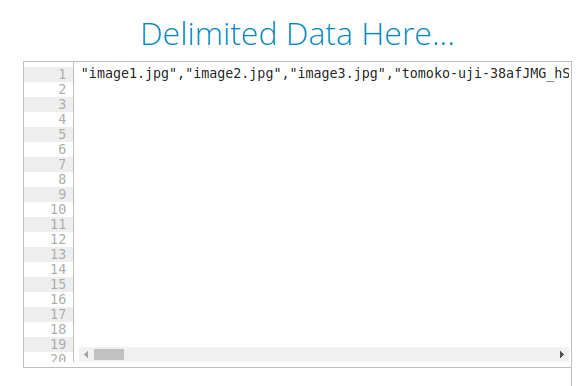
let images = ["image1.jpg", "image2.jpg", "image3.jpg"]
It is very important to add the images between " " and separated by commas.
If you're not familiarized with javascript, the let reserved word means that we are just declaring a variable called "images".
Then we have the function document.getElementById("gallery"), this function finds the element <section> with the id="gallery". We store the element found in the variable "gallery".
Finally, we have the map function. This function acts like a loop. For people not familiarized with javascript or programming, this will read all the contents of the array "images" one by one, ie first it will go through "image1.jpg", then "image2.jpg" and finally "image3.jpg". When it is the turn of the corresponding image, it will have a temporary name "image". For each "image", we are going to add a <img>element to the element gallery we previously found, this is with the function innerHTML, which allows us to change the content of an element. There we indicate that we want to append <img src=imgs/${image} />. You can see we used ` instead of " or ', this is important because using this symbol javascript allows us to mix javascript variables with text (string variables). To mix the temporal variable "image", we just have to write it with the format ${image}.
The +=means that the content will be added one after one, and not replace all the previous content, if we youst set the =, the gallery will only show the last image, because each time the content will be replaced.
Horray! If you save your changes and refresh the page, you will see that know we have all the images in the website. And if you inspect your page, you will see that it appears that you have tree images there like if you write it manually. Is like magic!

Let's get started with the jQuery method
What is jQuery?
jQuery is a fast, small, and feature-rich JavaScript library. It makes things like HTML document traversal and manipulation, event handling, animation, and Ajax much simpler with an easy-to-use API that works across a multitude of browsers. With a combination of versatility and extensibility, jQuery has changed the way that millions of people write JavaScript.
In other words, jQuery can help us to write javascript more easily, in terms of finding and modifying the elements of a webpage.
Add jQuery to your project
Go back to your gallery.html file, and inside the <head>tag add the following:
<!--EXCLUDE_SCRIPT_0-->
Create your script
Just after the </body> closing tag, add the following script:
<script>
        let images = ["image1.jpg","image2.jpg","image3.jpg"]
        images.map(image => {
            $("#gallery").append(`<img src=imgs/${image} />`);
        });
</script>
Quick explanation:
This works exactly the same as the pure javascript version, but with some small differences. Here we don't have to call the function getElementByID, because jQuery allows us to access directly to elements through their class or id, using the syntax $("#gallery"). Then jQuery has a special function append, which works exactly the same as innerHTML+=.
And that's all! Tecnically the difference with javascript and jQuery is how we wrote the code, but both do exactly the same.
We're almost finish, we need to add some style because in this case the images are to big to display them.
Continue adding style to the gallery
From here it doesn't matter which method you're using, jquery or javascript, what follows works for both.
Create an style.css file and add the following code to fix the size of the images and also for the gallery doesn't look so plain, don't forget to link your page to the stylesheet with <link rel="stylesheet" href="style.css" />.
:root {
    --bg-color: #f5d4ff;
    --text-color:#fff;
}

* {
    margin: 0;
    padding: 0;
    box-sizing: border-box;
}

body {
    background-color: var(--bg-color);
    color: var(--text-color);
    text-shadow: 1px 1px 2px #999;
    font-family: sans-serif;
}

header {
    margin: 2rem 0;
}

header h1 {
    font-size: 2rem;
    font-weight: normal;
    text-align: center;
}

main {
    width: 80%;
    margin: 20px auto;
}

#gallery {
    display: flex;
    flex-wrap: wrap;
    justify-content: center;
}

#gallery img {
    margin: 10px;
    max-width: 300px;
    height: max-content;
    padding: 1rem;
}

footer {
    text-align: center;
    font-size: 0.9rem;
    padding-bottom: 1rem;
}

@media only screen and (max-width: 768px) {
    main {
        width: 95%;
    }
}
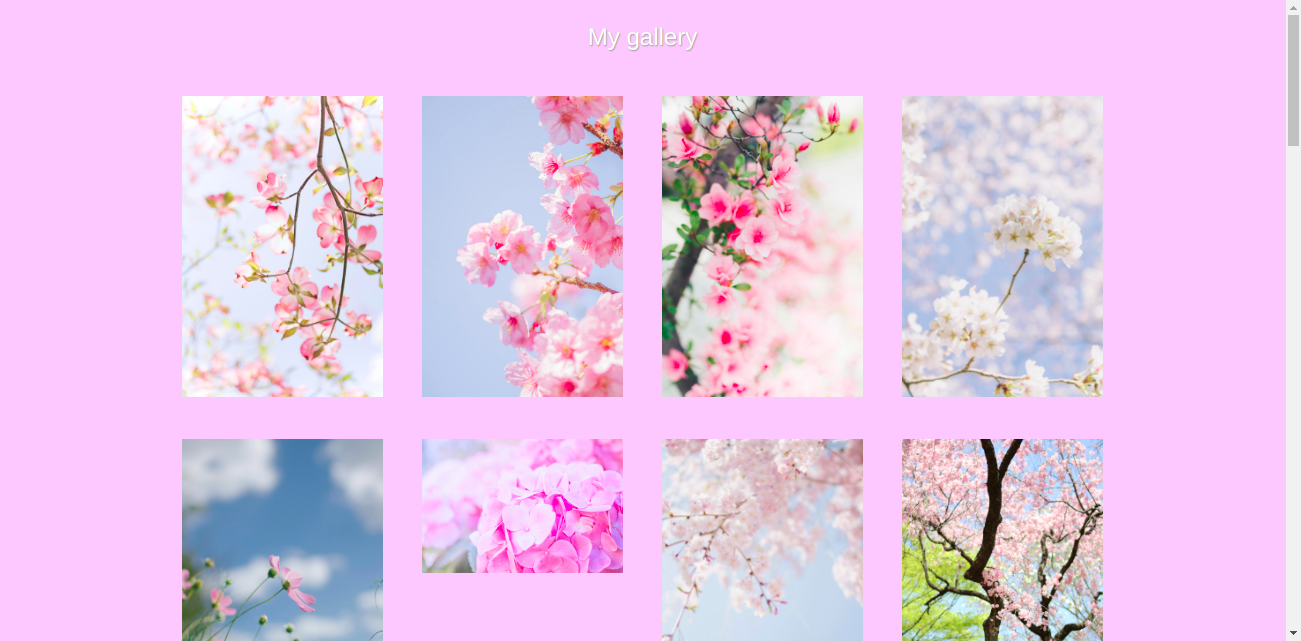
Now your gallery should look like this:
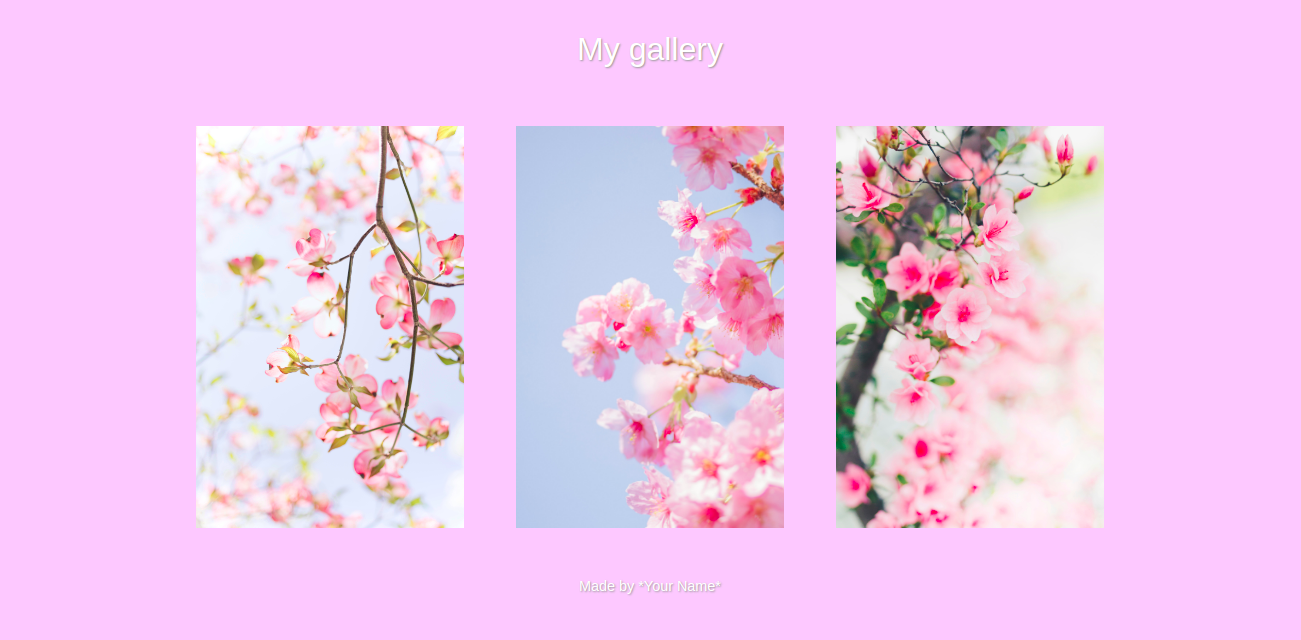
Much better. Customize your gallery as much as you want!
Big quantity of images
Technically now we have our gallery! But imagine you have like 100 images, or your images have big names like the ones in my screenshot, you don't want add the names to the array one by one. This trick will help you a lot with the process (works in all operating systems).
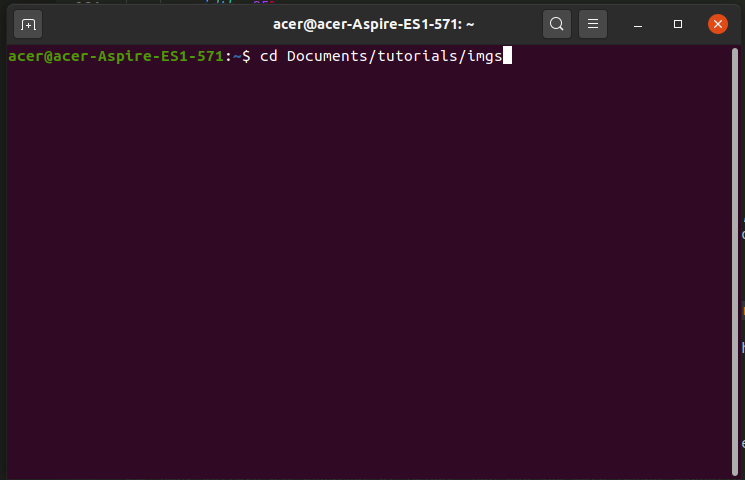
- Open your terminal or command prompt of your operating system.
- Enter the following command:
cd YOUR PATH TO YOUR IMAGES FOLDER. For example in my case my path is "Documents/tutorials/imgs", so my command iscd Documents/tutorials/imgs.
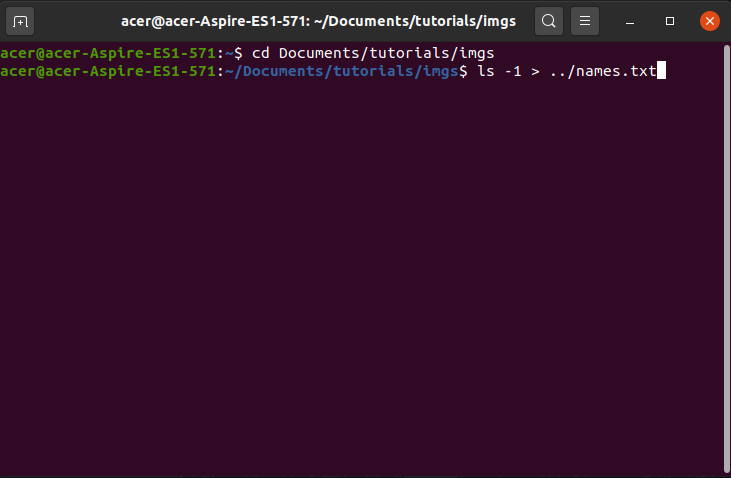
- Enter the command:
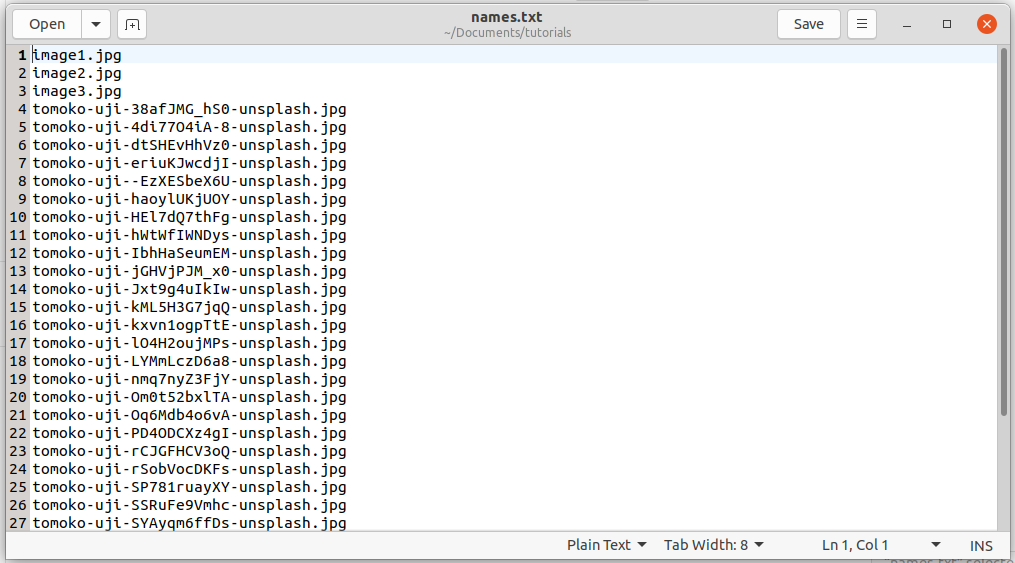
ls -1 > ../names.txt. This will generate a file "names.txt" with all the names of your images, as you can see in the image. Open the generated file and copy all its contents.
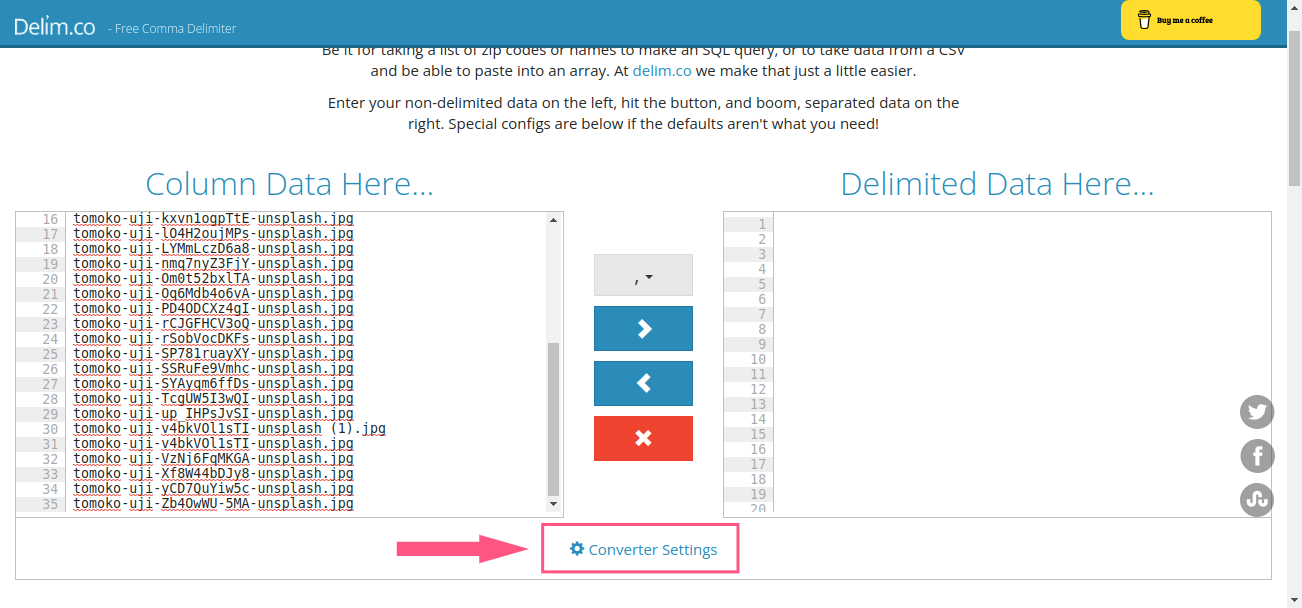
- Go to this website https://delim.co/, and paste the content in the "Column Data Here" column.
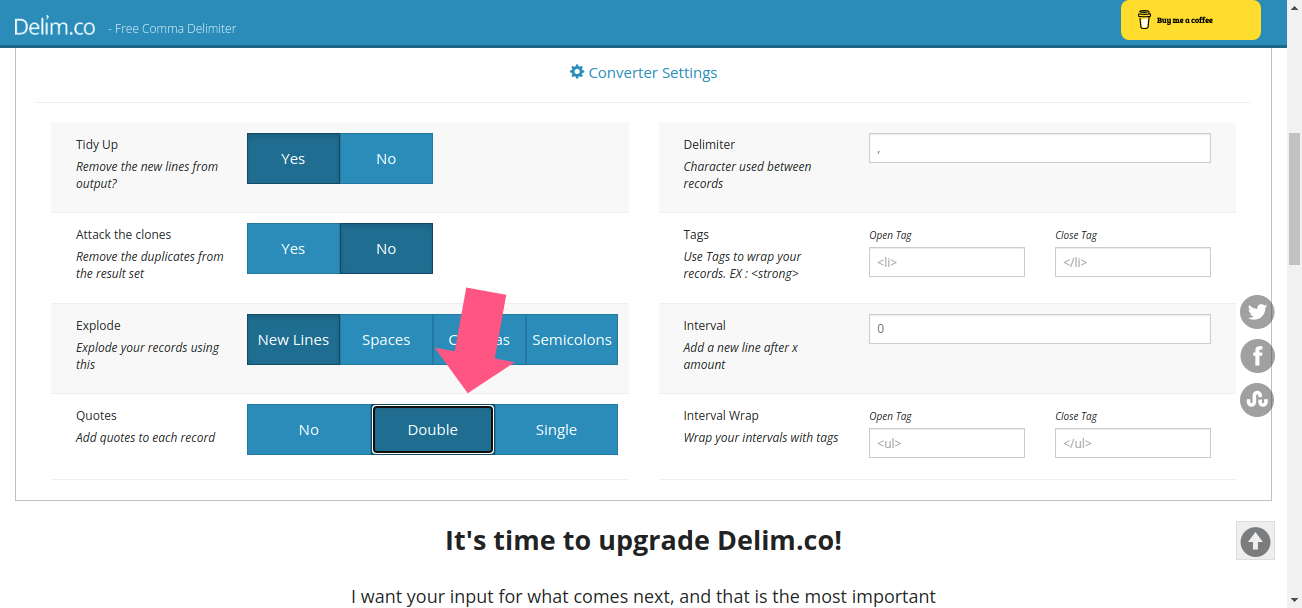
- Click the option "Converter Settings" and where it says Quotes, select "Double".
- Click the right arrow button and now you have all your names separated by double quotes and commas"!
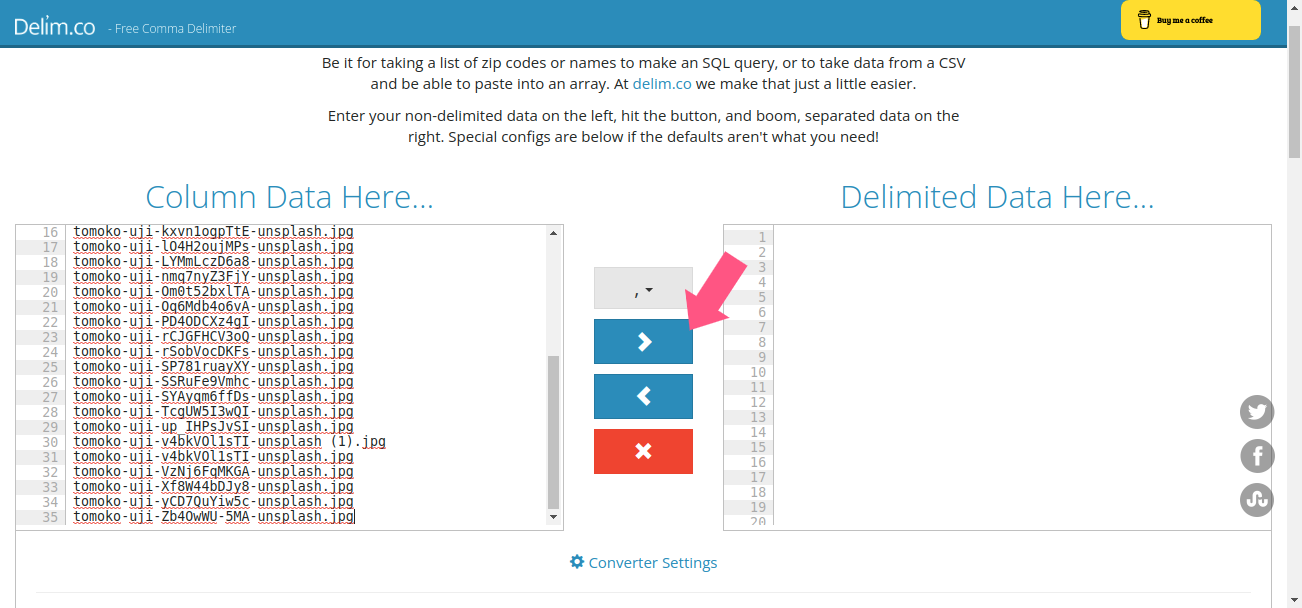
- Select and copy again, and paste the content inside of the array "images". Note: Don't replace all the content, if you repeat names the images will appear repeated too.
Now your gallery has a lot of images, you can add more images manually adding the names in the array or repeating the trick again.
Bonus: Open the image in a new tab.
If you want your images to have links to a new window, for the javascript method just replace the function inside map with the following
gallery.innerHTML+= `<a href="imgs/${image}" target="_blank">
                        <img src=imgs/${image} />
                    </a>`;
In this case, we are also generating dynamically link tags to all our images. Note that using the `also allows us to write javascript text with blank lines without problems, with " and ' we CAN'T do that.
For the jQuery method, replace the function content map with the following:
$("#gallery").append(`<a href="imgs/${image}" target="_blank">
                        <img src=imgs/${image} />
                      </a>`);
Bonus 2: Generate more complex structures!
With both methods we can also create more complex content dynamically, for example, let's create a gallery of polaroids with the name of the image with it. For the javascript method, replace the function inside map with the following:
gallery.innerHTML += `<div class="polaroid">
                              <a href="imgs/${image}" target="_blank">
                                <figure>
                                    <img src=imgs/${image} />
                                    <figcaption>
                                        <em>${image}</em>
                                    </figcaption>
                                </figure>
                              </a>
                        </div>`;
For the jQuery method, replace the content inside map with the following:
$("#gallery").append(`<div class="polaroid">
                              <a href="imgs/${image}" target="_blank">
                                <figure>
                                    <img src=imgs/${image} />
                                    <figcaption>
                                        <em>${image}</em>
                                    </figcaption>
                                </figure>
                              </a>
                            </div>`);
Note that althougth this looks like html, anything inside ` is just text. The functions innerHTML and append converts this text to html elements.
Now add the following css to your previous style.css file:
.polaroid {
    background-color: #fff;
    margin: 10px;
    height: max-content;
    box-shadow: 5px 5px 10px #999
}

.polaroid a {
    text-decoration: none;
}

.polaroid figcaption {
    color: rgb(94, 92, 92);
    text-align: center;
    padding: 1rem 0;
}
Now our gallery looks like this:

That's all! Experiment with different designs and see what happens.
Conclusions and recommendations
We have built a dynamic gallery using two methods, one using pure javascript and one with jQuery, it can have hundreds of images and the maintenance will be a piece of cake.
This tutorial was aimed at people with little or no experience in javascript or programming in general. You can have a cool website without being an expert, but if you are interested in following the path of web development in the future, I recommend that you delve into the area of programming and learn javascript. Web development is a world, but javascript will be a good way to start your path. Also I recommend learning some jQuery basics, because it's really useful when you want to interact directly with the elements of a page withough the need of calling a lot of functions.
Which method use?
I have presented you three forms of doing the same thing, you can use any of them, but maybe this advices will help you.
If you want to make a simple and fast gallery, I mean without a complex structure, and also you don't have or don't want to depend on any external framework like jQuery or Vue, use the pure javascript method.
If you want to do the same thing as the previous point but for some reason you are already using jQuery, use the jQuery method.
If you want to have a gallery with a more complex structure, I recommend using the VueJS method, since being able to handle the html elements directly as they are instead of text is a pretty good advantage and avoids having syntax errors.
Thank you for reading! I hope this tutorial has been helpful.
I'll also add a tutorial to open the images in a popup. Stay tunned ✨.
Download the full code of the project here.
Learn Javascript at w3schools.com
Learn jQuery at w3schools.com too
Learn Vue at vuejs.org
Never stop trying 🌠
Credit for the example images: TOMOKO UJI